Developing an Add-On for FormCraft
A FormCraft add-on can be activated and installed just like any other WordPress plugin. Also, the user would be able to tinker with the add-on options from the form editor interface:

-
Registering an Add-On
Function
Use this in your main plugin file:
add_action('formcraft_addon_init', 'formcraft_demo_addon');
function formcraft_demo_addon()
{
	register_formcraft_addon( $function, $id, $plugin_name, $controller_name, $logo_url, $templates_url, $conditional_trigger);
}
Parameters for register_formcraft_addon
- $function
A PHP function which outputs the content of add-on’s settings. See image:
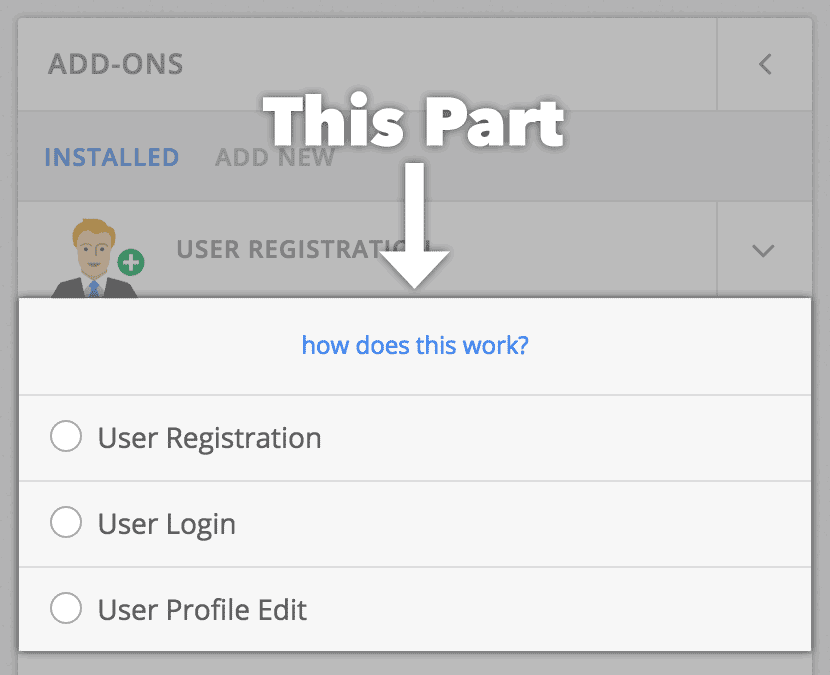
- $id
FormCraft has a plugin directory, which the users can access by clicking on Add New. If we list your plugin on the directory, we will give you a unique Plugin ID which you need to put here. Else, just type 0. - $plugin_name
Example: MailChimp, Demo Plugin - $controller_name
We use Angular JS to power FormCraft. You can harness the power of Angular JS to give the users a seamless interface. This requires a working knowledge of JavaScript. This is optional. If you wish to use Angular, use a controller name, like: MailChimpController, or DemoController. If not, just use false. More on this later. - $logo_url (optional)
Path of the logo of your add-on. Example: if your addon has a directory named images, and the logo file is called logo.png, here you would use plugins_url(‘assets/logo.png’, __FILE__ ) - $templates_url (optional)
When creating a new form, users can select from a variety of templates to begin with. Your add-on can have its own set of templates which the users can choose from. How? Create a FormCraft form, and export it (Options -> Extras -> Export Form File). Add a directory named templates to your add-on, and save the exported .txt file here. It’s that simple.
In this field, set the location of this directory. Example: plugin_dir_path( __FILE__ ).’templates/’ - $conditional_trigger (optional)
Conditional logic allows users to trigger an integrations when certain conditions are met. If you would like your add-on to participate, type 1. Else, 0.

- $function
-
Using Angular JS in Your Plugin
You can show add-on settings to the users using the above function, but how do you save, or retrieve them? By using Angular JS in your add-on, you let FormCraft take care of this. So, assuming you do plan to use Angular, this is how you proceed to make an add-on which throws an error if the end-user uses a banned email host in the email field:
- You mention the controller name DemoController in the register_formcraft_addon function. So, FormCraft now expects you to write a controlled of this name. Let’s see how.
- Create a new file, and type in this:
FormCraftApp.controller('DemoController', function($scope, $http) {
}
Save the file as demo_form_editor.js in your plugin directory.
- Now we use a hook to load this file on the form editor page:
add_action('formcraft_addon_scripts', 'formcraft_demo_addon_scripts'); function formcraft_demo_addon_scripts() { wp_enqueue_script('fc-demo-addon-js', plugins_url( 'demo_form_builder.js', __FILE__ )); } - Remember where we used register_formcraft_addon to pass a function name which we were to use to output add-on settings? Let’s say this function name was demo_addon_settings as
function demo_addon_settings() {
	echo "<input placeholder='Banned Email Hosts' type='text' ng-model='Addons.DemoAddon.banned_hosts'>";
}
ng-model is what we use to save the settings. It has three parts, separated by periods. The first is to remain Addons. The second is what we would later on use to fetch this data – DemoAddon. The third is the id of our setting – banned_hosts.
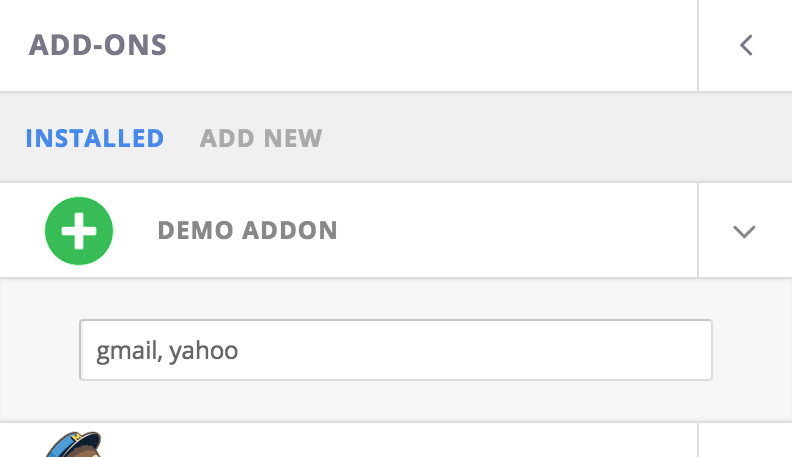
- Now, you would be able to see your add-on, and its settings. Edit a form, access your add-on settings, and type gmail, yahoo in the input field.
When you click on save, FormCraft will save your add-on’s settings as well. - Last Step: Every time a form is submitted, we will use a hook to check the data (before FormCraft saves it) and throw an error if the end-user has typed in an email from one of the hosts we banned:
We will now use the formcraft_before_save hook (read more about FormCraft hooks) and add a function to do this check, and throw an error if necessary:// We hook into form submissions to check the submitted form data, and throw an error if add_action('formcraft_before_save', 'formcraft_demo_addon_hook', 10, 4); function formcraft_demo_addon_hook($filtered_content, $form_meta, $raw_content, $integrations) { global $fc_final_response; $demo_addon_settings = formcraft_get_addon_data('DemoAddon', $filtered_content['Form ID']); // We check if we have specified any banned hosts in add-on settings. If yes, we save the list as an array: $banned_hosts if ( !empty($demo_addon_settings['banned_hosts']) ) { $banned_hosts = strpos($demo_addon_settings['banned_hosts'], ',') > -1 ? explode(',', $demo_addon_settings['banned_hosts']) : array($demo_addon_settings['banned_hosts']); $banned_hosts = array_map('trim', $banned_hosts); } foreach ($raw_content as $key => $value) { // We loop through the fields to find fields with the label Email if ( $value['label'] == 'Email' ) { foreach ($banned_hosts as $host) { // We loop through each of our banned hosts and check if the value of Email field contains an occurance of this if ( strpos($value['value'], '@'.$host) > -1 ) { // If yes, we show this general error message $fc_final_response['failed'] = "There is an issue with your form"; // We also show an error message with every such email field. Here, $value['identifier'] is the field ID $fc_final_response['errors'][$value['identifier']] = $host." is a banned host"; } } } } }
-
Directory
We would love to include your add-on in our add-on directory. Users will be able to see your plugin in the Add-ons -> Add New tab, and download it with one-click. Request Listing.