How To Use Conditional Logic
FormCraft has powerful built-in Conditional Logic. You can use it to:
- Show / Hide fields
- Send Emails to Recipients
- Redirect to Custom URL on Submit
- Trigger Intergrations
- Set Value of Other Fields
-
Show / Hide Fields:
Lets go for a simple tutorial. Add a Datepicker, a Checkbox, and a Custom Text field to your form. Make your form look like this:
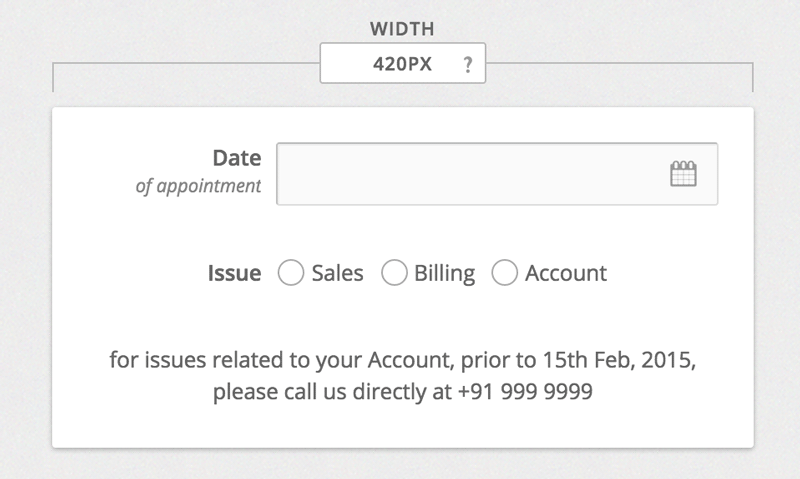
Now, go to Logic, and click on Add New Logic. Our job is to show the text field, if the user selects a date before 15th Feb, 2015, AND has selected the option Account.
So, our logic would look like this:
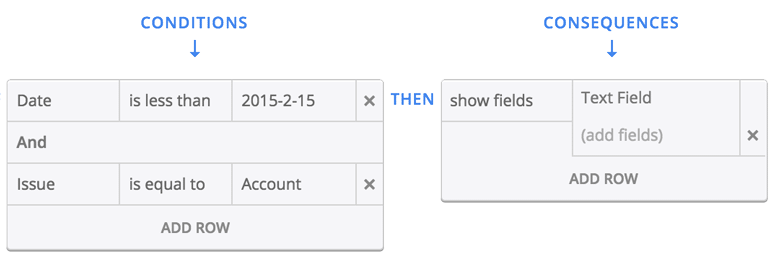
When using the Datepicker field in Conditional Logic, it is important that you use the format YYYY-MM-DD, as seen above. Also, note that we can choose between AND / OR. Since we want to show the Text Field when both conditions are fulfilled, we will stick with AND.
Now, edit the text field in our form, and check the option Hide Field on Page Load. Since we are showing the field when certain conditions are fulfilled, we would also want to make sure the field is hidden on page load.
Under Conditions, it is not necessary to compare an absolute value. You can compare the value of two fields. Example, you can use the condition: Email is equal to [field12] to trigger an action only when the value of the email field is equal to the value of the field with the ID field12
-
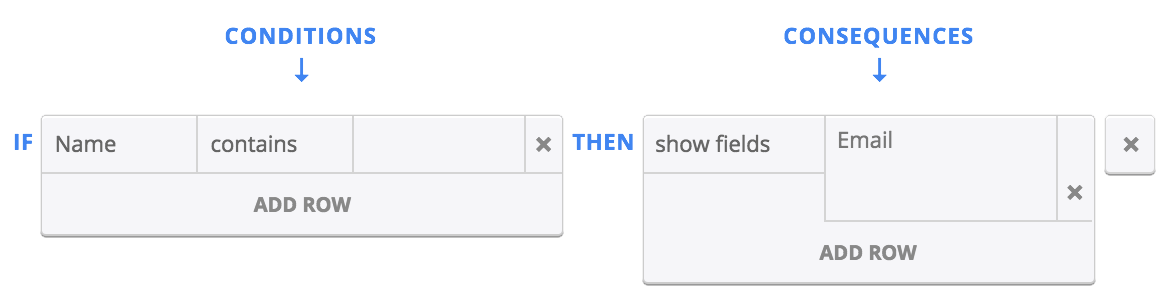
Special Case 1: Show Field When Not Empty
You might want to show a field when the first field contains any value (i.e., it is not empty). In this case, use this logic:
-
-
Send Emails to Recipients
Add a Checkbox field to your form, and add the options:
Sales
Billing
Account
Now, when the user selects Sales, we want to notify sales@example.com. When he selects Billing, we will notify jack@example.com.
So, we need to add two simple logics:
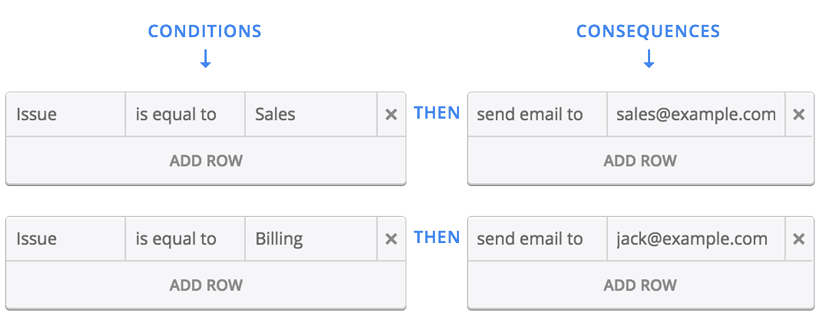
You can add multiple emails by separating them with a comma.
-
Redirect to Custom URL on Submit
Add a Checkbox field to your form, and add the options:
Sales
Billing
Account
Now, when the user selects Sales, we want to redirect him to the page: http://example.com/thank-you.
This is fairly simple:
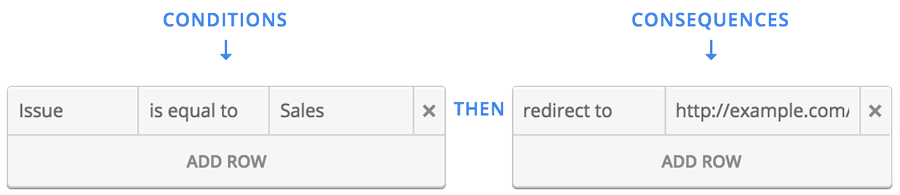
You can also use form values in the URL itself, like:
http://example.com?issue_selected=[Issue]
-
Trigger Integrations
So, you want a contact us form which has a checkbox field, Sign Up For Updates. If the users checks this field, you want to add his email to your MailChimp list. First, add a checkbox field, with only one option:
Signup for Newsletter
When editing this field, also check the option Allow Multiple Selections, since this would allow the user to check / uncheck the one option:

Next, we use this simple conditional logic:

-
Set Value of Other Fields
Add an email field to your form, and a checkbox field. Label the checkbox field Gmail Account?. Our form looks like this:
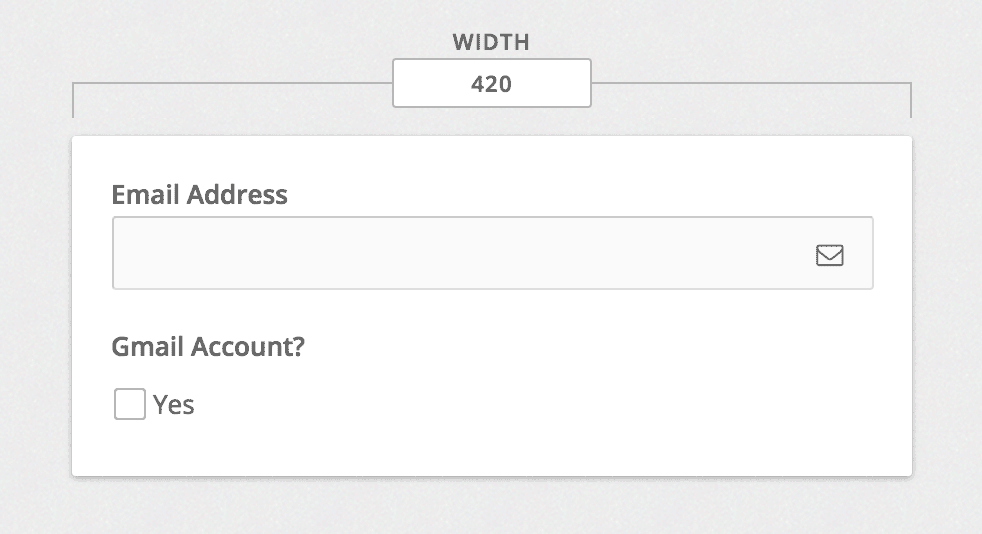
Now add a new logic:
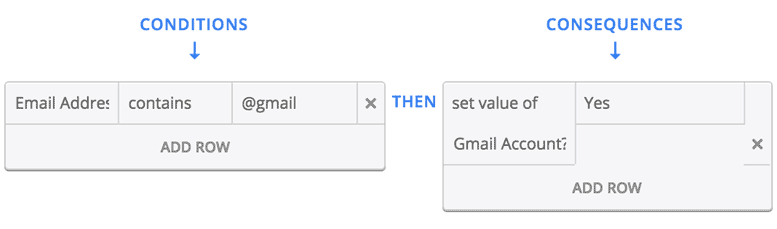
So, if the text entered by the user in the email field contains @gmail, we automatically set the value of the other field to Yes (in this case, check the option Yes)
Note: Working With Checkbox / Dropdown Fields
Checkbox and dropdown fields allow you to set a value which is separate from label. The front-end user only sees the label. You type the value and label in the same line, separated by a ==
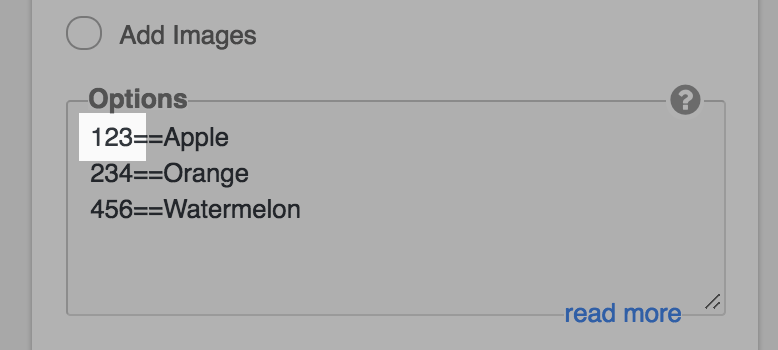
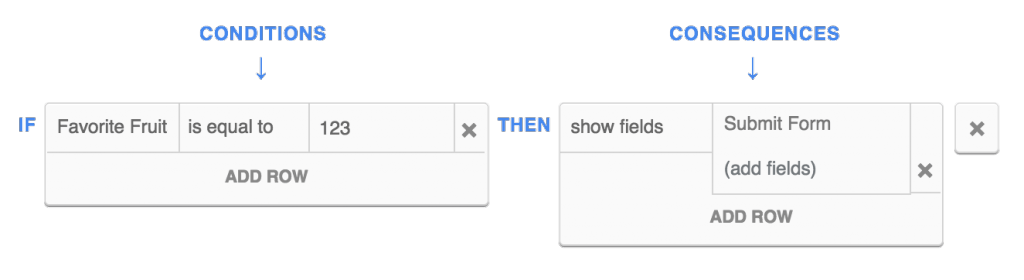
If you want to use conditional logic with this field, you would use the value when defining conditions. If we want to show a certain field when the user selects Apple, we would use the logic:
If MyField is equal to 123 show MyField2
since the value of the option corresponding with the Apple label is 123.