How to Use the Booking Addon
The booking add-on allows you to let people book appointments or event tickets by adding a simple field to your form.
- Purchase the add-on here, install it, and activate it.
- Edit your form and add the booking field via Add Field -> More Fields -> Booking.
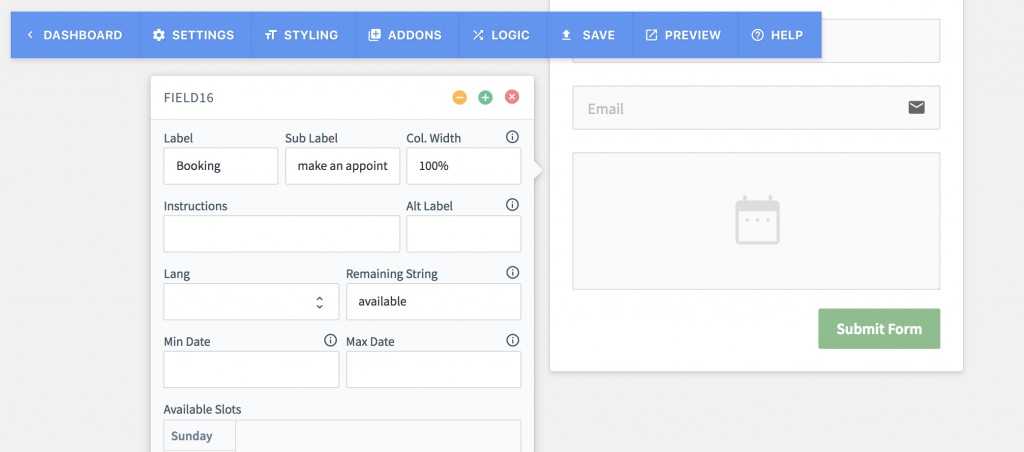
- We are taking appointments for a barber shop which is open on weekdays.We want people to book appointments from the day after today, and up to 15 days in advance. We enter those numbers under Date Min and Date Max respectively.Under Available Slots we would select Monday and enter the time ranges we want to make available (each time range in a new line), and the respective slots for each range. We copy these and paste them for other days as well, from Monday through Friday.

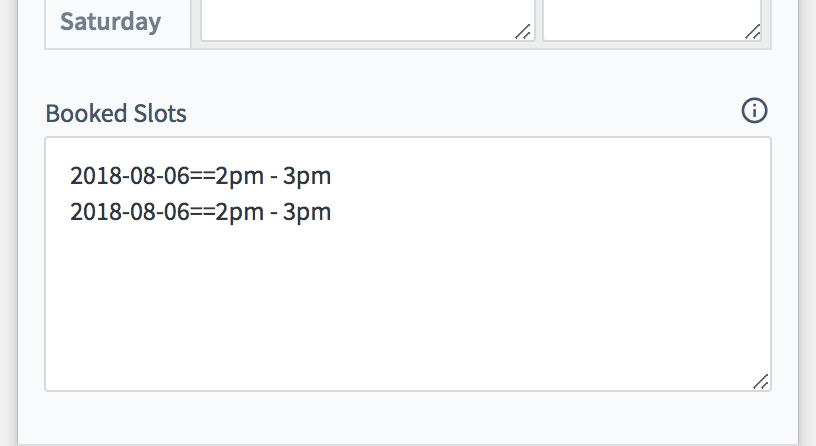
- Our booking platform is ready. However two of our barbers called to inform us that they won’t be taking bookings for the time 2pm – 3pm on the 6th of August. We can adjust that in FormCraft. See Booked Slots. This area represents the bookings the customers have made for us. You can manually delete them to cancel bookings, or add new lines to manually add a booking, or simply block off a booking.We add two lines to block off two slots for the time 2pm – 3pm on the 6th August, 2018. For the date always the format yyyy-mm-dd. That’s it. Save the form.
Bonus Feature: See Remaining Slots Using Shortcode
You can use a shortcode on your page to see the remaining slots for a particular booking field. The shortcode looks like this:
[fc_bookings_remaining form='22' field='field17' date='2018-07-30' slot='3pm - 3:45pm'/]
Note that all fields are necessary. ‘Form’ is the form ID, and ‘field’ is the field ID. The date has to be in the yyyy-mm-dd format.
How to Create a New Zap using The Zapier AddOn
Our Zapier addon allows you to connect FormCraft to one of the hundreds of apps available on Zapier.
- You can purchase the Zapier addon here. Install and activate the addon.
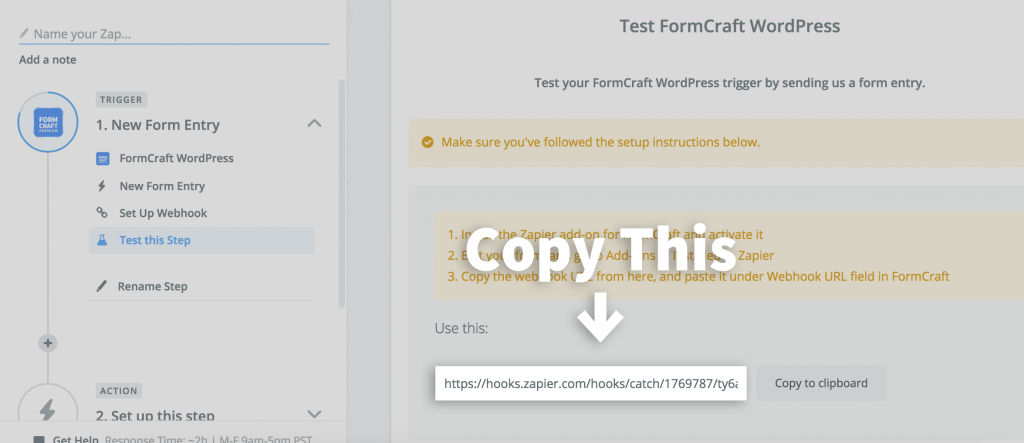
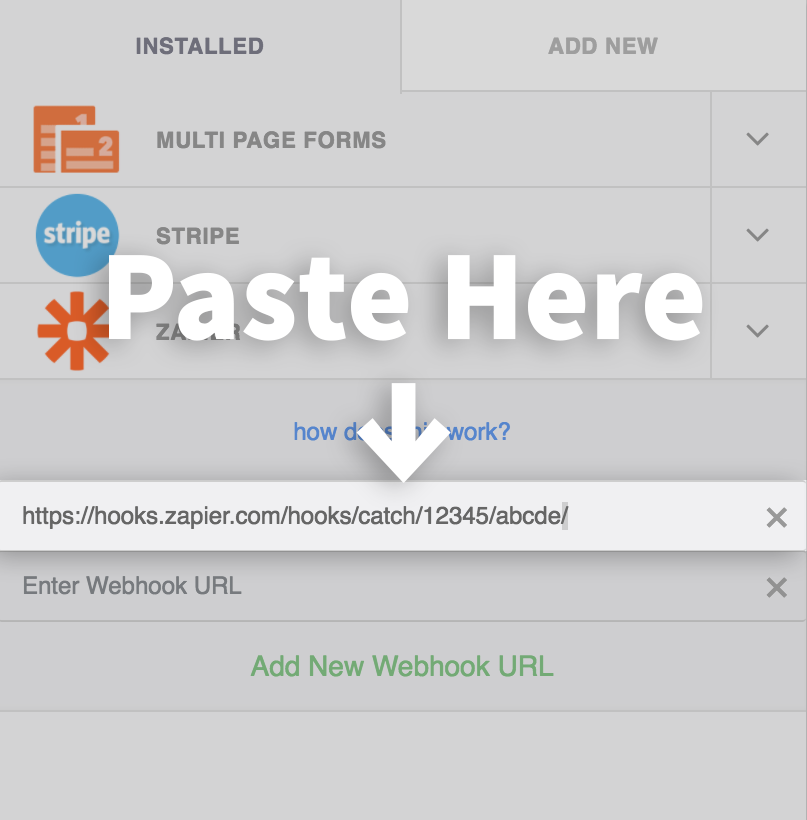
- Use this link to go to Zapier.com and hit Make a Zap! button. This will take you to the setup screen. Under Choose a Trigger App, select FormCraft WordPress, and choose New Form Entry as the trigger. On the Test this Setup screen, you will find a Webhook URL, as seen on the below image. Copy this URL and paste it under Webhook URL in FormCraft.
- On the next step, Zapier will show a Looking for form entry text. Go back to FormCraft, save your form, hit Preview. Now fill the form and hit Submit. Go back to Zapier. It should recognise your form entry.

- Now we need to setup an action for our New Form Entry trigger. For our example, we would like to add a new MailChimp subscriber on each form submit. We select MailChimp -> Add/Update Subscriber. After you complete the setup, hit Finish, and turn your Zap on.
How to Build a PayPal Subscription Form
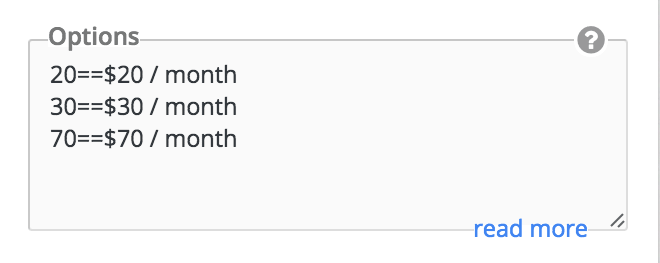
- Add a Checkbox field to your form. Note the field ID – field6. Add these options:
20==$20 / month
30==$30 / month
70==$70 / month
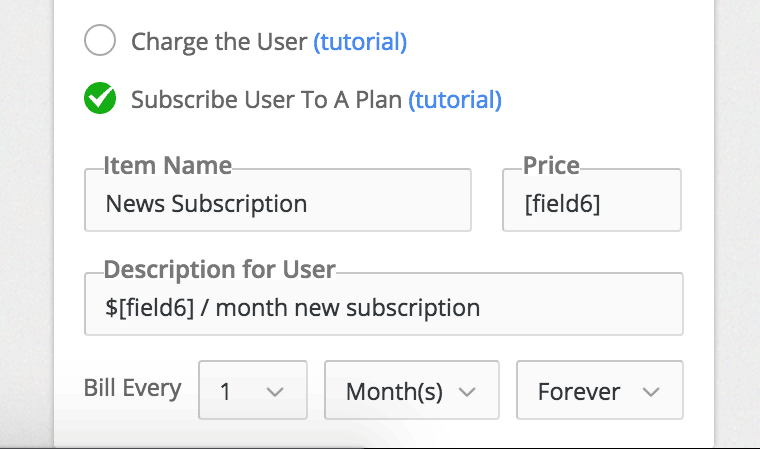
- Add a PayPal field (Payments -> PayPal). Check the option Subscribe User to a Plan. Under Price, type in [field6], which was our field which allowed selecting the plan cost. Make other necessary changes to the frequency and duration of the billing, and add your email under PayPal Email. Our form is ready.
How to Build a PayPal Order Form
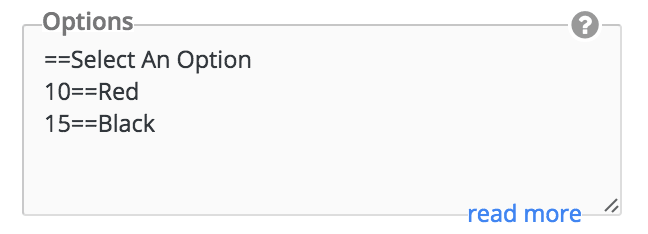
- Add a dropdown field to your form. Note the field ID – field3. Label this field Shirt, and these options:
==Select An Option
10==Red
15==Black
- Add another dropdown field to your form. Note the field ID – field4. Label this field Quantity, and these options:
==Select An Option
1
2
3
4
5
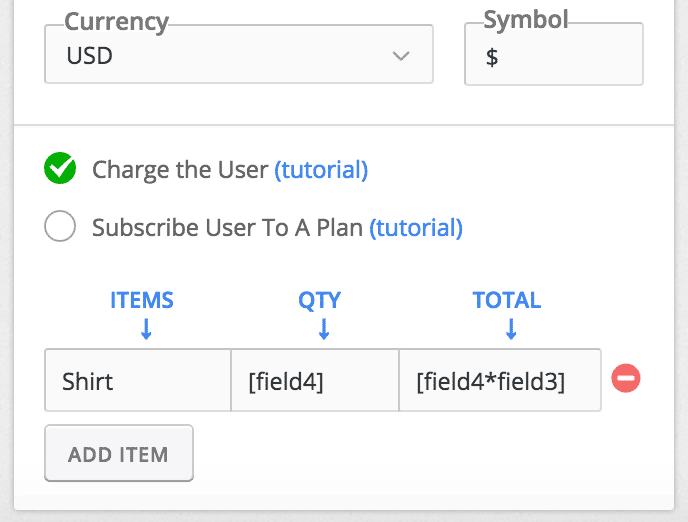
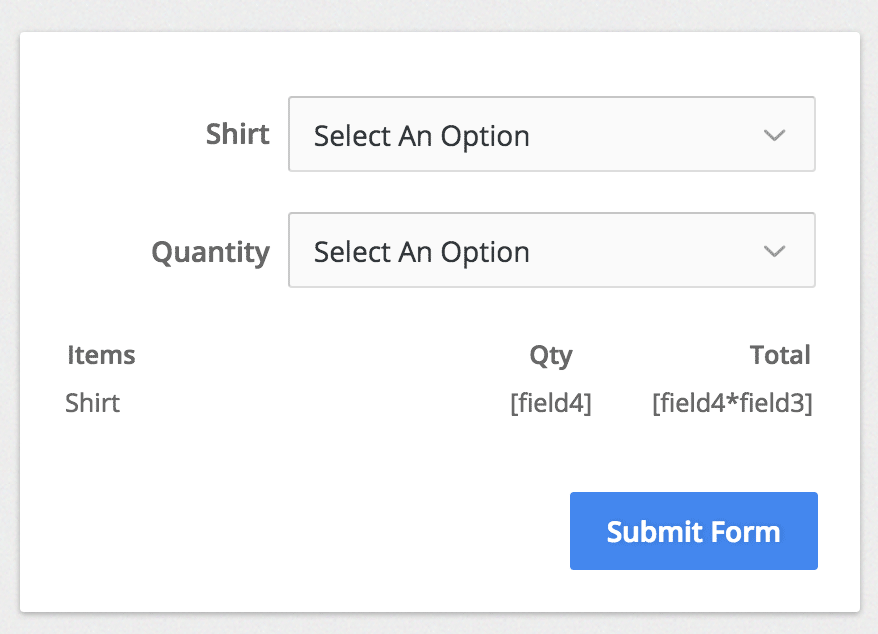
- Now add a PayPal field (Payments -> PayPal) to your form. When editing this field, check the option Charge the User. Below this, you can specify Items, Quantity and Totals.
Under Items, type Shirt. Under Qty, type in [field4], which was our quantity field. Under Total, type in [field3*field4] – we are multiplying the shirt type with the quantity to arrive at the total:
- Add your email to the PayPal Email column. Our form is now ready. Click on Preview.
How To Configure Get Response Add-On
So, assuming you have installed and activated our Get Response Add-On, this is how you proceed.
- Click on Add-Ons, in the form editor page. Click on the down arrow to expand the Get Response Settings. You need to enter the Get Response API key, and click on Check. Where to find the API Key?

- If the key is valid, you would be able to see more options now. To submit data to your Get Response list, we need to first map your form data to Get Response.
You should be able to see three fields.
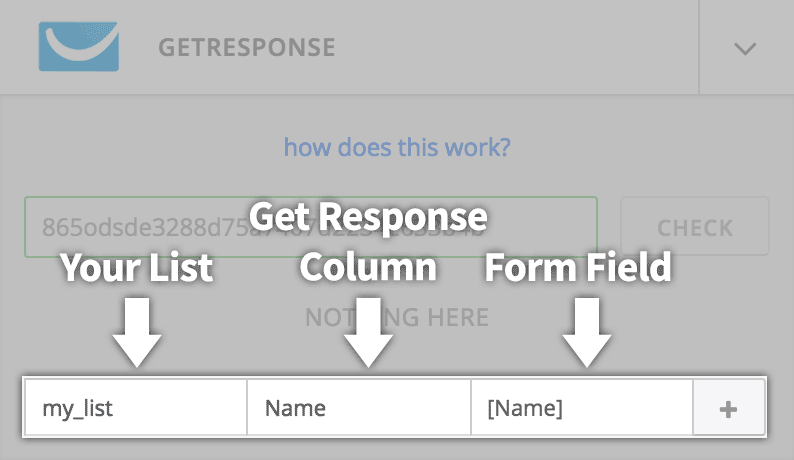
In the first one (Your List), select the list / campaign you wish to add to. In the second field (Get Response Column), select the Get Response column, and in the third field (Form Field), type in the label of the form field this Get Response column corresponds to. The label needs to be enclosed in square brackets.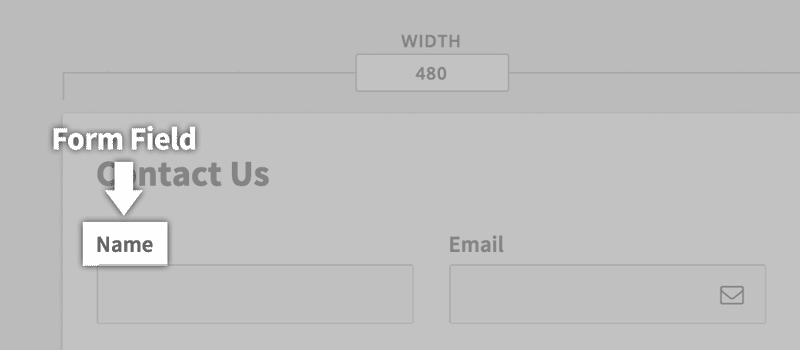
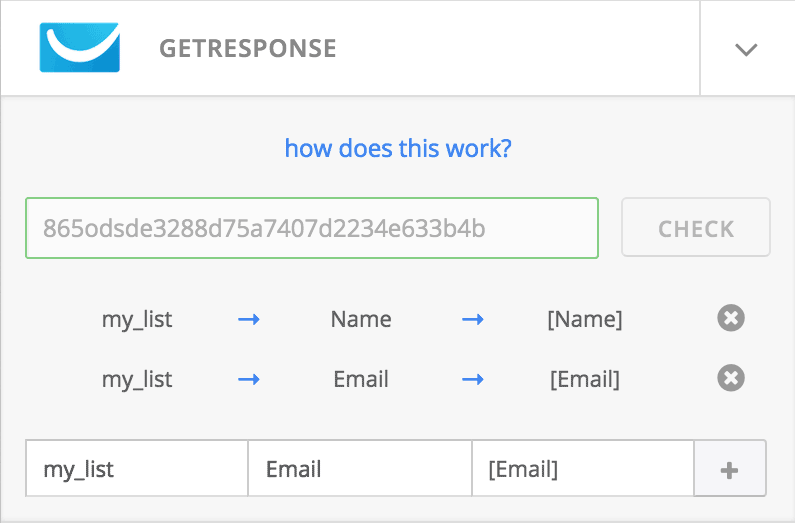
- Almost there. Now map rest of the fields from our form. You map to another list as well, allowing you to add users to more than one list, at once. Now click on Save, and we’re done!
How To Configure Campaign Monitor Add-On
So, assuming you have installed and activated our Campaign Monitor Add-On, this is how you proceed.
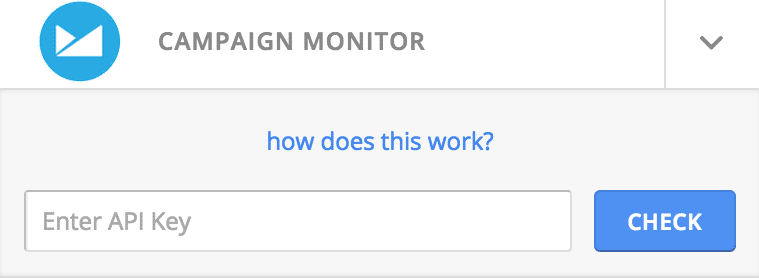
- Click on Add-Ons, in the form editor page. Click on the down arrow to expand the Campaign Monitor Settings. You need to enter the Campaign Monitor API key, and click on Check. Where to find the API Key?
- If the key is valid, you would be able to see a dropdown option, where you need to select the client account you wish to connect to. To submit data to your Campaign Monitor list, we need to first map your form data to Campaign Monitor.
You should be able to see three fields.
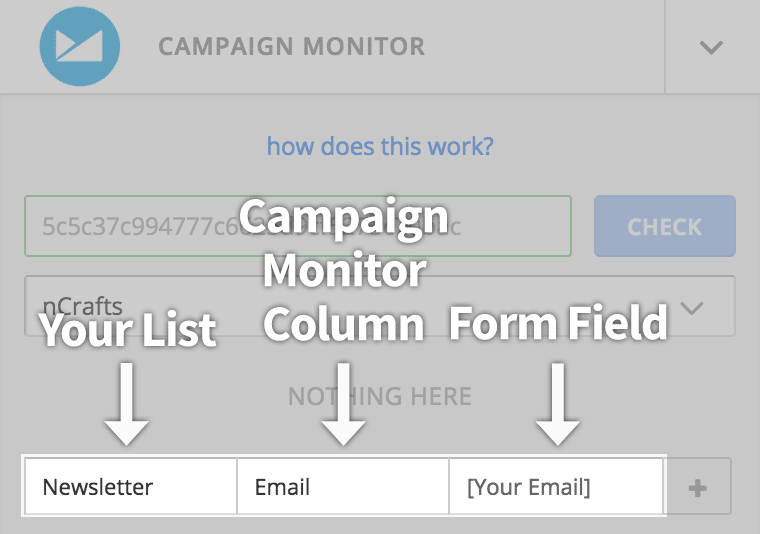
In the first one (Your List), select the list you wish to add to. In the second field (Campaign Monitor Column), select the Campaign Monitor column, and in the third field (Form Field), type in the label of the form field this Campaign Monitor column corresponds to. The label needs to be enclosed in square brackets.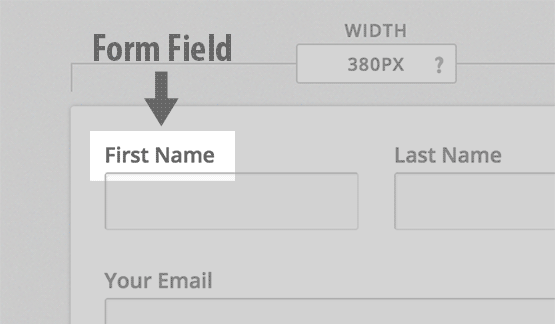
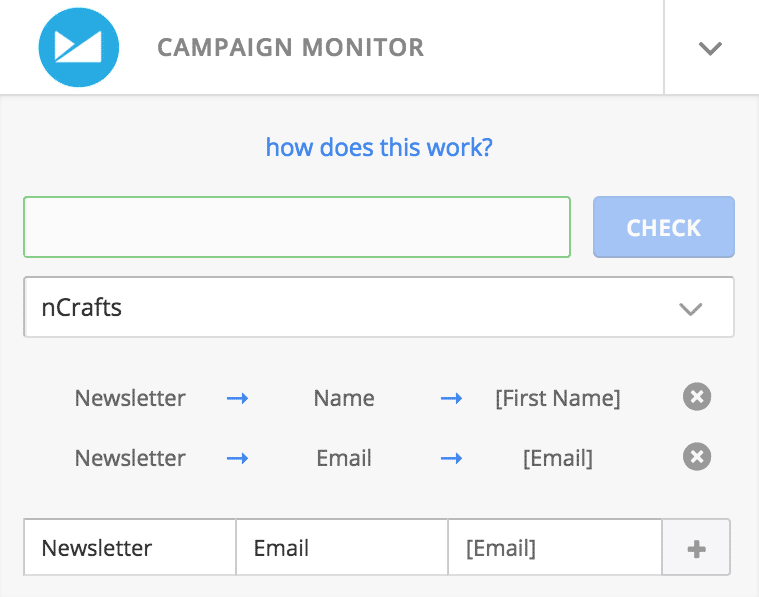
- Almost there. Now map rest of the fields from our form. You map to another list as well, allowing you to add users to more than one list, at once. Now click on Save, and we’re done!
How To Configure “Form To Post” Add-On
Form To Post Add-On allows you to create posts using the forms. This add-on has support for custom post types, custom taxonomies, and custom fields.
See below a simple example:
- Add a One Line Input field to your form, for accepting Post Title. Label this field Name. Now add a Textarea field, for accepting Post Content. Label this field Plot Summary.
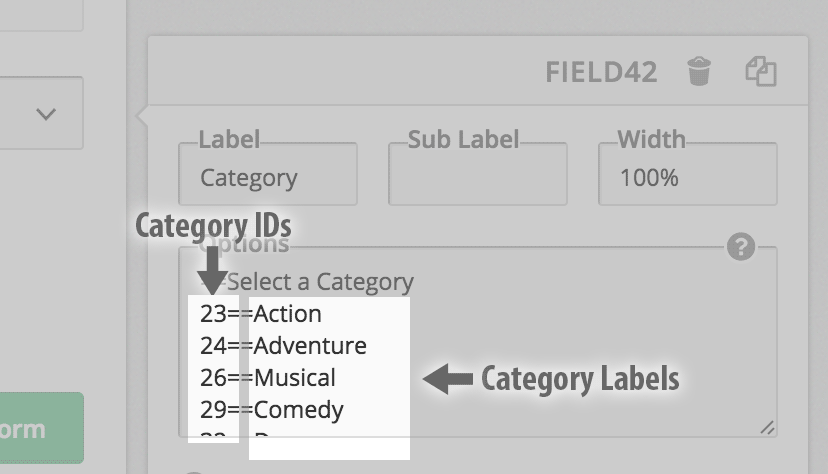
- Now we add a Dropdown field, which allows users to select the category. In this field, we add available categories to the Options column, in this format:
23==Action
Here, 23 is the category ID, and Action is what the user sees when he makes a selection
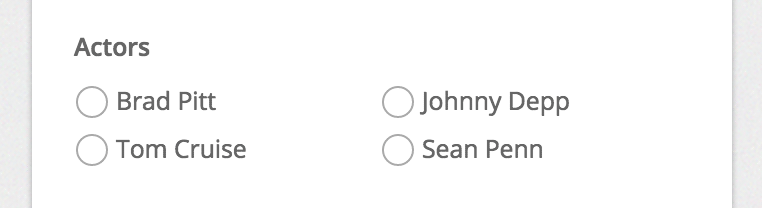
- Now we add a Checkbox field, for our custom taxonomy, Actors. We label this field Actors:
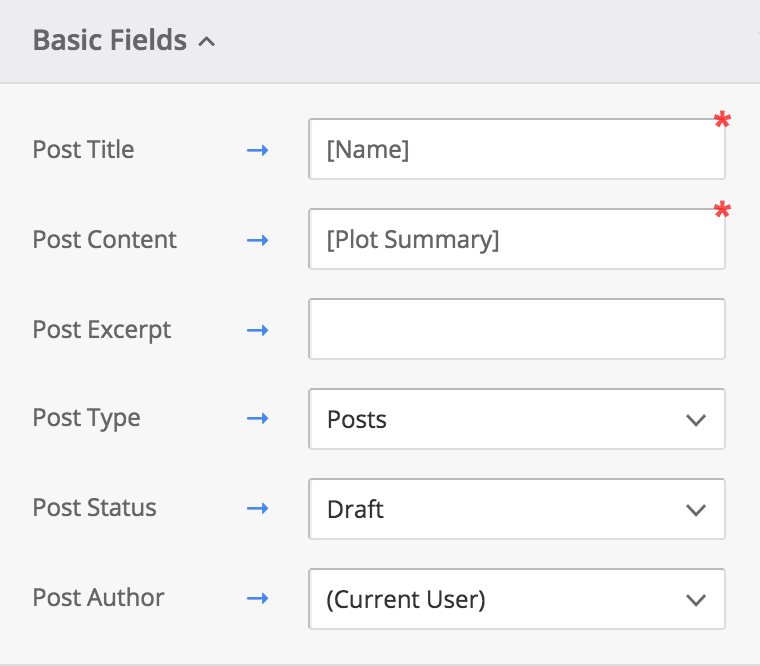
- Now go to Add-Ons -> Form To Post. Remember the label of our Post Title field? Name. To map Post Title to this field, we type in [Name] in the column Post Title:
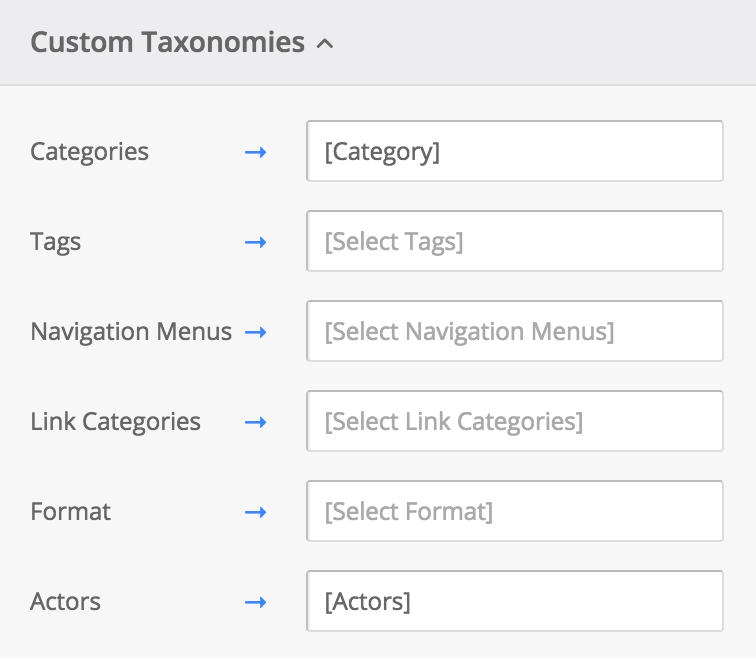
And the same for Custom Taxonomies, which would include the Category and Actors fields:
- That’s it. Now click on Preview and try it out!
How to Build a Stripe Subscription Form
- Go to Add-Ons -> Stripe. You will see 4 api key fields here. To find your Stripe api keys, login to Stripe dashboard, go to Account Settings -> API Keys. Enter the keys.
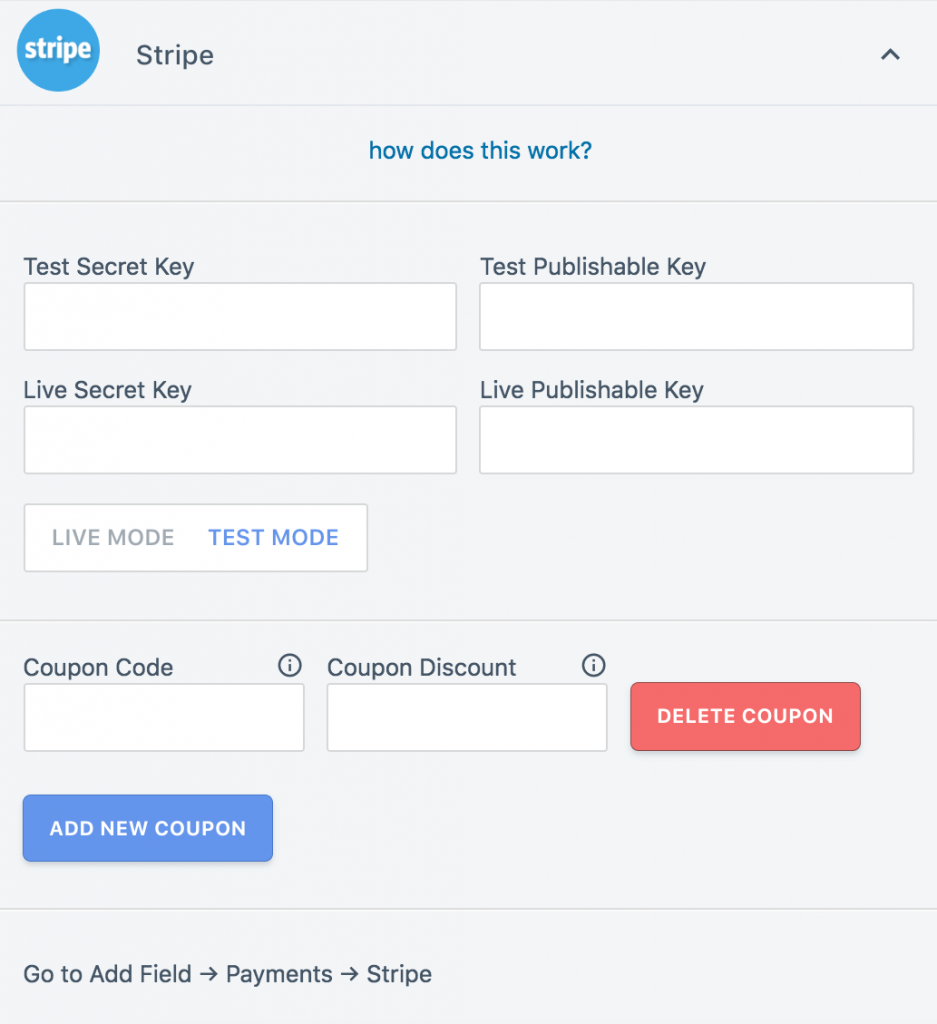
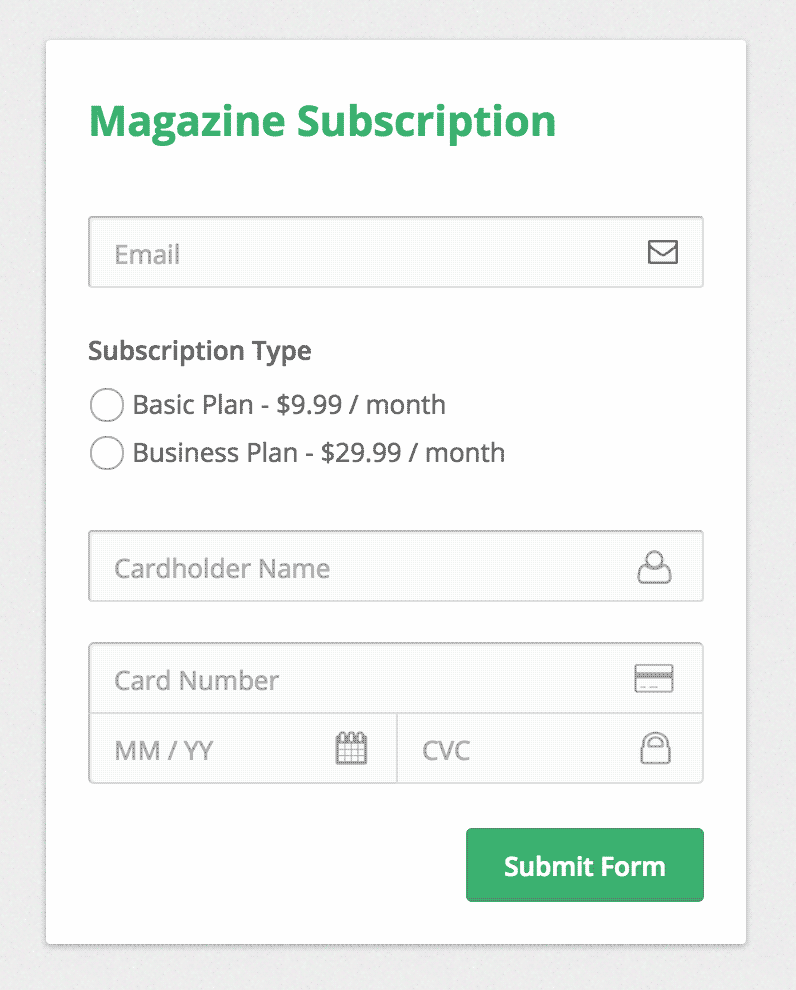
Here, you will also find the option to choose between Live Mode and Test Mode. Test Mode allows you to use Stripe’s demo data to simulate transactions (read more). - Now, let us make a form to place a magazine subscription online. First, let us add a simple Email field to our form.
Next, we add a Checkbox field which allows users to select the type of subscription they want.
In the Options box of our checkbox field, we enter our subscriptions in this format:
basic_plan==Basic Plan – $9.99 / month
Here, the part to the left of == is the plan ID assigned to the item, and the part to the right of == is what the user sees.

Also note the field ID of this field. In this case, it is field30Where to find the Plan IDs?
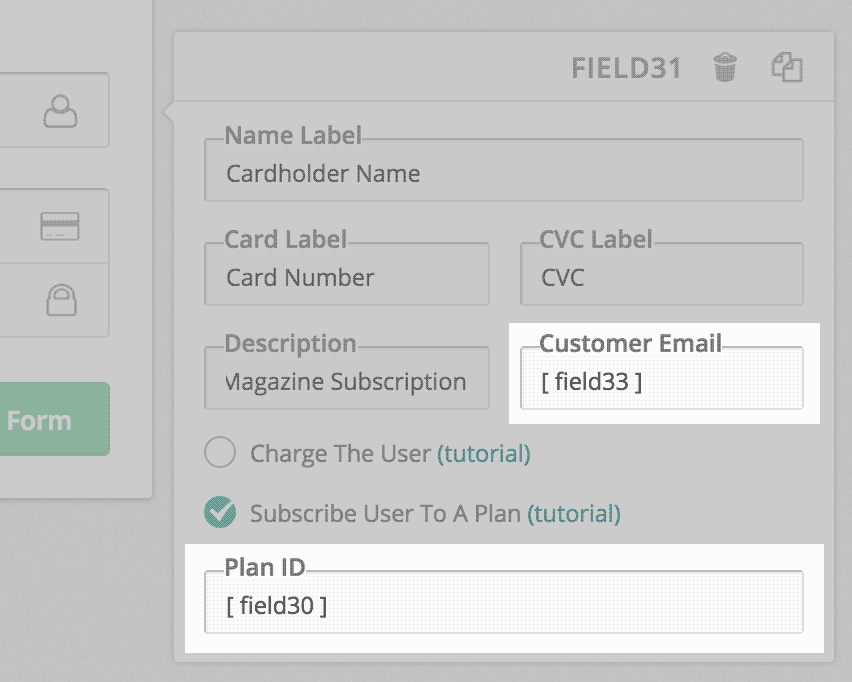
Go to your Stripe Dashboard, and head over to Billing -> Products. You will see a products section here with a list of the pricing plans. Click on a plan and you should be able to see the ID on the next page. - Lastly, we add the Stripe field. Go to Add Field -> Payments -> Stripe. Check the option Subscribe User To A Plan. Remember the field ID of the field where we entered all our plans? Type that in the Plan ID field. Also, type the field ID for our Email field in the Email column:
- That’s it. We are good to go:
How to Build a Stripe Order Form
- Go to Add-Ons -> Stripe. You will see 4 api key fields here. To find your Stripe api keys, login to Stripe dashboard, go to Account Settings -> API Keys. Enter the keys.
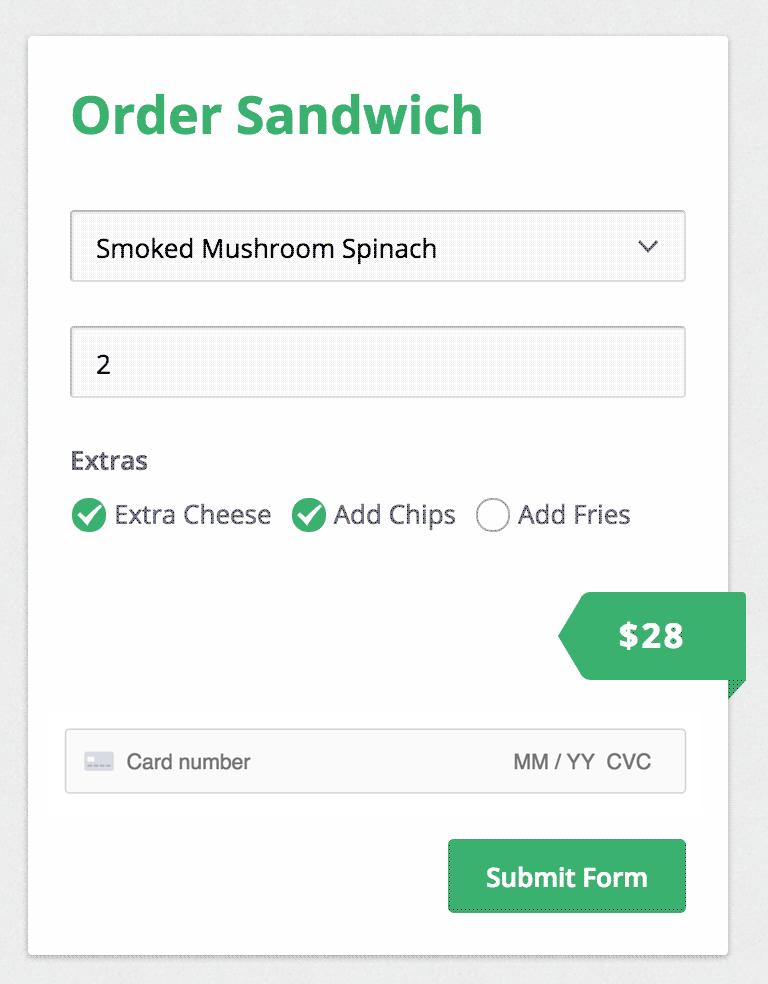
Here, you will also find the option to choose between Live Mode and Test Mode. Test Mode allows you to use Stripe’s demo data to simulate transactions (read more). - Now, let us make a form to order sandwiches online. First, we add a Dropdown field which allows users to select the sandwich they want.
In the Options box of our field, we enter our menu in this format:
10==Smoked Mushroom Spinach
Here, the part to the left of == is the value assigned to the item, and the part to the right of == is what the user sees.
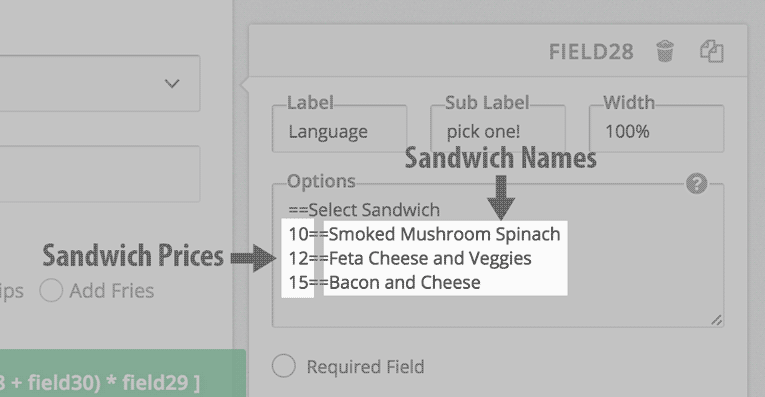
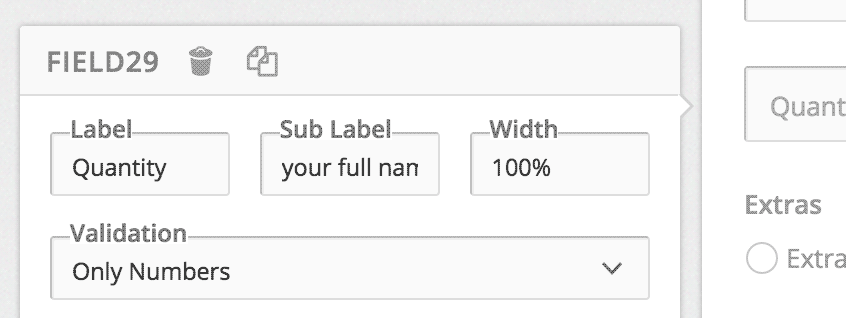
Also note the field ID of this field. In this case, it is field28 - Next, we add a simple One Line Input field, which allows users to enter the quantity they wish to order. Nothing fancy here. Note the field ID: field29
- Now, we add a Checkbox field, which allows users to select Extras. This field also has an Options column, which works similar to what we saw in Step #1. We are not greedy, so we price all are extras at $2 each. Note the field ID: field30

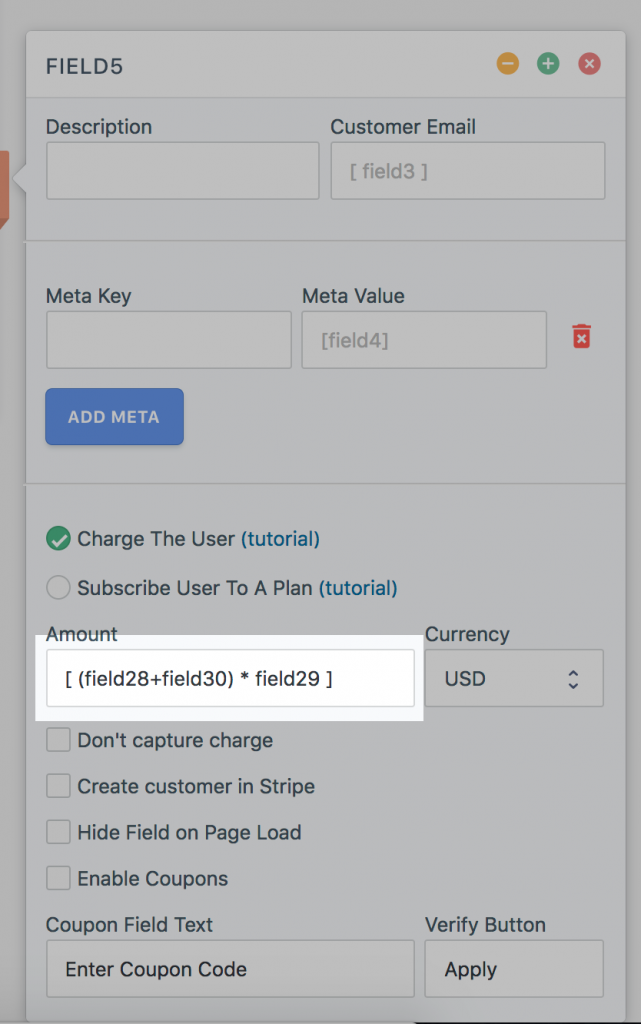
- Lastly, we add the Stripe field. Go to Add Field -> Payments -> Stripe. So, how do we decide the final price? We add the sandwich price and the price of extras, and then multiple it by the quantity:
[ ( Sandwich Price + Extras ) * Quantity ]
Substituting the field IDs here, we get:
[ ( field28 + field30 ) * field29 ]
This is what we enter in the Amount column of our Stripe field:
- That’s it. Our form is ready:
How To Configure Pre Populate Fields Add-On
The enable the add-on go to Addons -> Pre Populate Fields and check the option ‘Enable Addon‘
This add-on basically allows you to set default, or dynamic values, to your forms when your users see it.
- How To Set Default Form Values
- How To Populate Forms With User Data
- How To Populate Forms With Data From URL
- How To Populate Forms With Post Data
-
How To Set Default Form Values
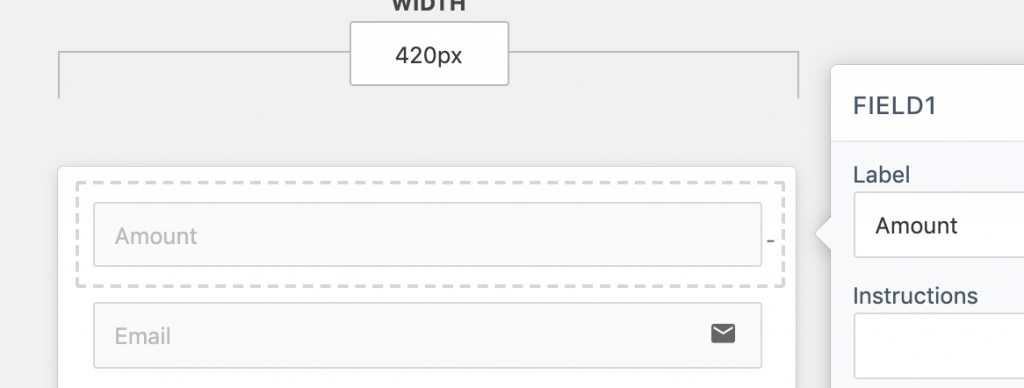
When editing your form enter the default values you want in the form itself:
-
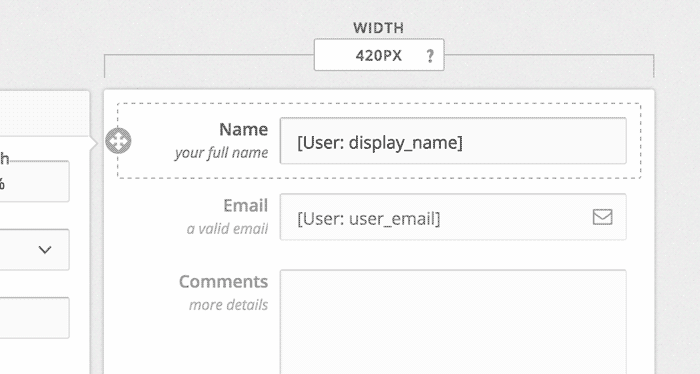
How To Populate Forms With User Data
When editing the form use the format [User: key] example:
You select from a bunch of tags:
[User: ID]
[User: user_login]
[User: user_email]
[User: user_url]
[User: user_registered]
[User: display_name]
[User: first_name]
[User: last_name]
[User: nickname] -
How To Populate Forms With Data From URL
You can use URL attributes to populate the form via field IDs, like this example:

You can find the field ID when you click on a field when editing the form:
-
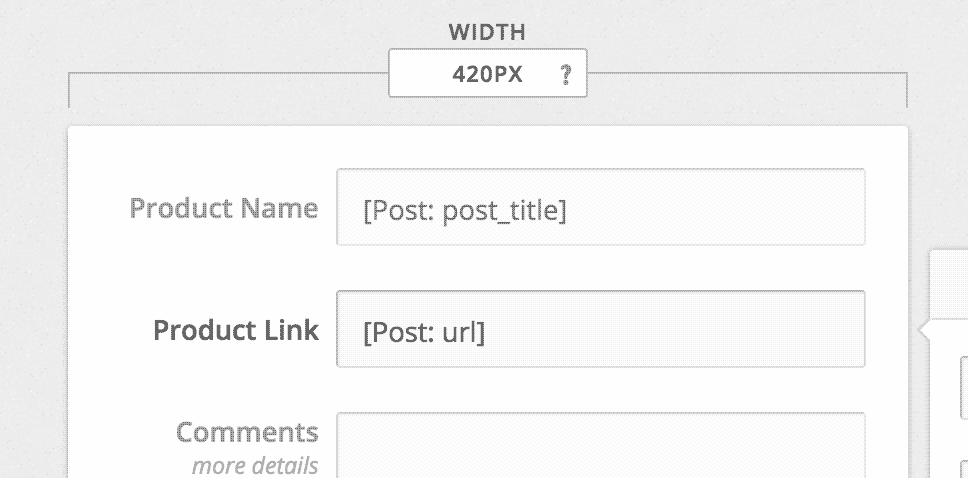
How To Populate Forms With Post Data
Use the format [Post: key]
You select from a bunch of tags:
[Post: ID]
[Post: url]
[Post: post_date]
[Post: post_title]
[Post: post_status]
[Post: post_name]It also works with custom fields in your post. For custom fields, use this format:
[Post: custom_field_name]