Form Data Insights
‘Insights’ is a new feature, added in FormCraft 3.3. It turns FormCraft into a powerful survey and polling tool.
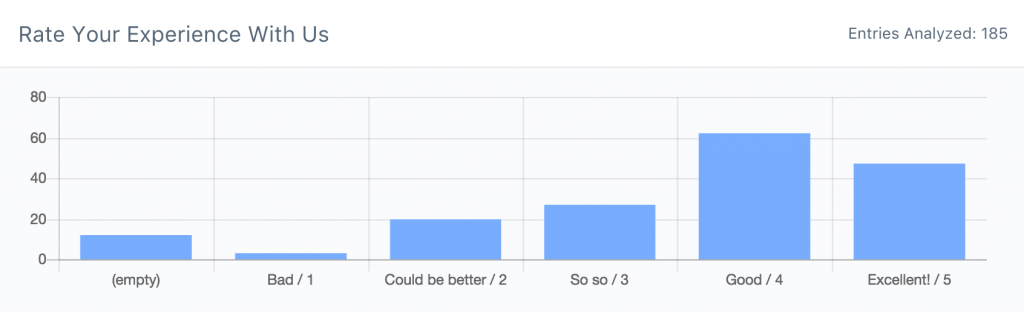
You can access this from the ‘Insights’ page. You can get insights for any form, and restrict your data to a particular period. In case of large datasets, you can also restrict the maximum number of entries you want to include in the insights.
No Insights Available
FormCraft can analyze certain fields to produce insights like dropdown, rating, checkboxe, date, slider, etc … If your form does not contain any of these fields you will see the No Insights Available error.
How to Export Forms
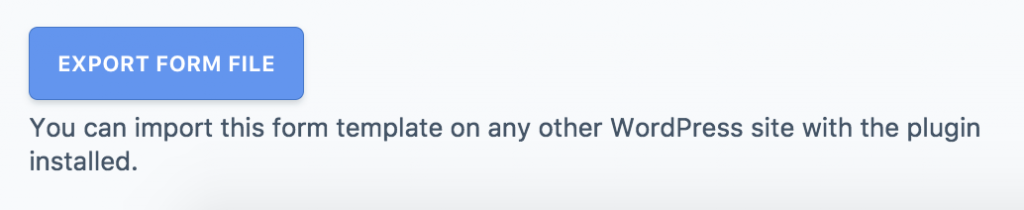
FormCraft allows you to easily export your forms. You can store these forms as backup, and import them in any other FormCraft installation. Please note that forms exported from FormCraft 3.x will not work on FormCraft 2.x or FormCraft 1.x.
-
Export Forms
To export a form, go to Settings -> Advanced, and click on Export Form File. You will get a .txt file. This is the form file.
-
Import Forms
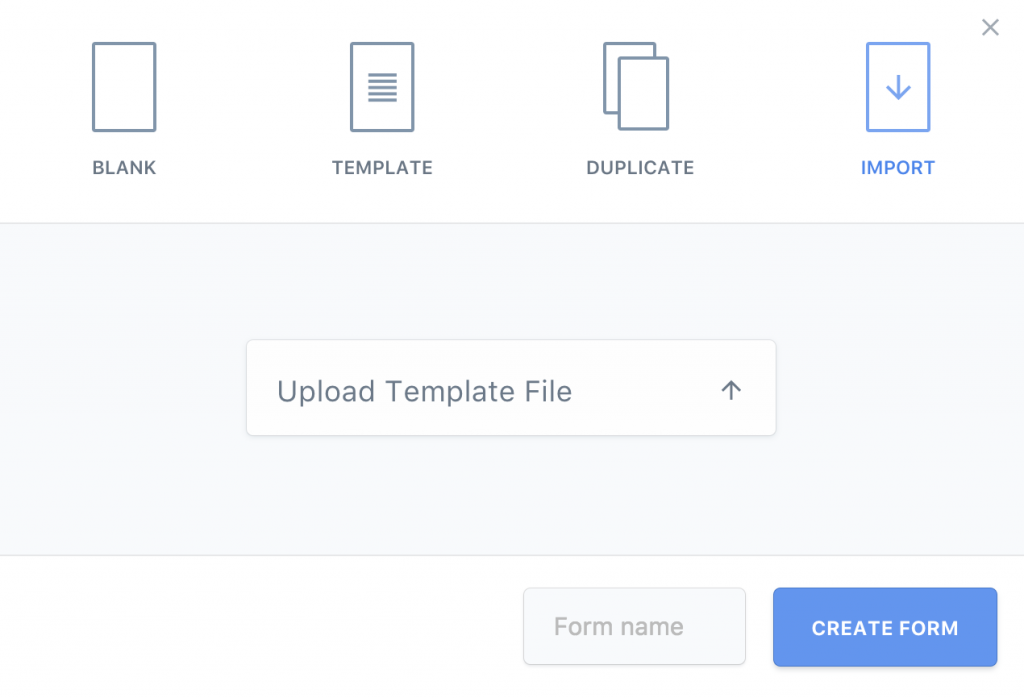
To import a form, go to the FormCraft dashboard, and click on Add New. In the popup, click on Import. Click on Upload Template File and browser the .txt file we previously imported. Give a name, and click Create Form.
How to Send Email Autoresponders
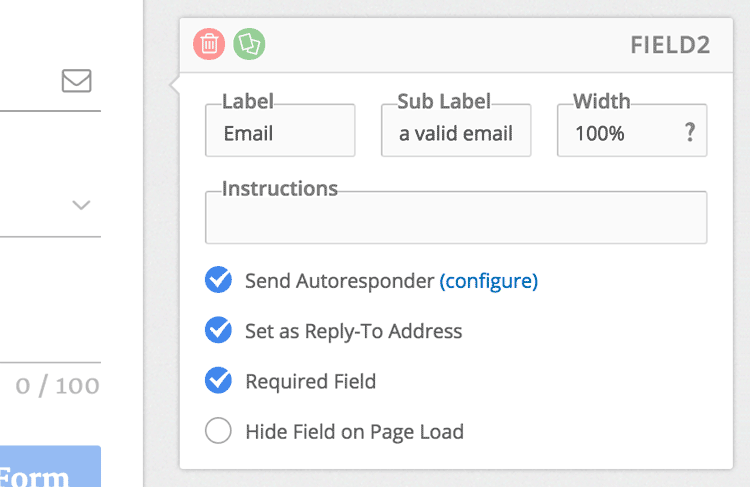
FormCraft allows you to send autoresponders (or thank-you emails) to users who fill the form. First, add an email field to your form. Click on the field to edit it, and check the option Send Autoresponder.
Click on the configure link to edit the content of this autoresponder email. Here, you can edit the Sender Name and Sender Email, as well as Subject and Email Body of the autoresponder. You can use form values in any of these fields. Click here to learn more about customising email content.
How to Send Email Notifications
FormCraft allows you to send email notifications to a group of recipients, on each successful form submission.
Go to Options -> Email -> Email Notifications.
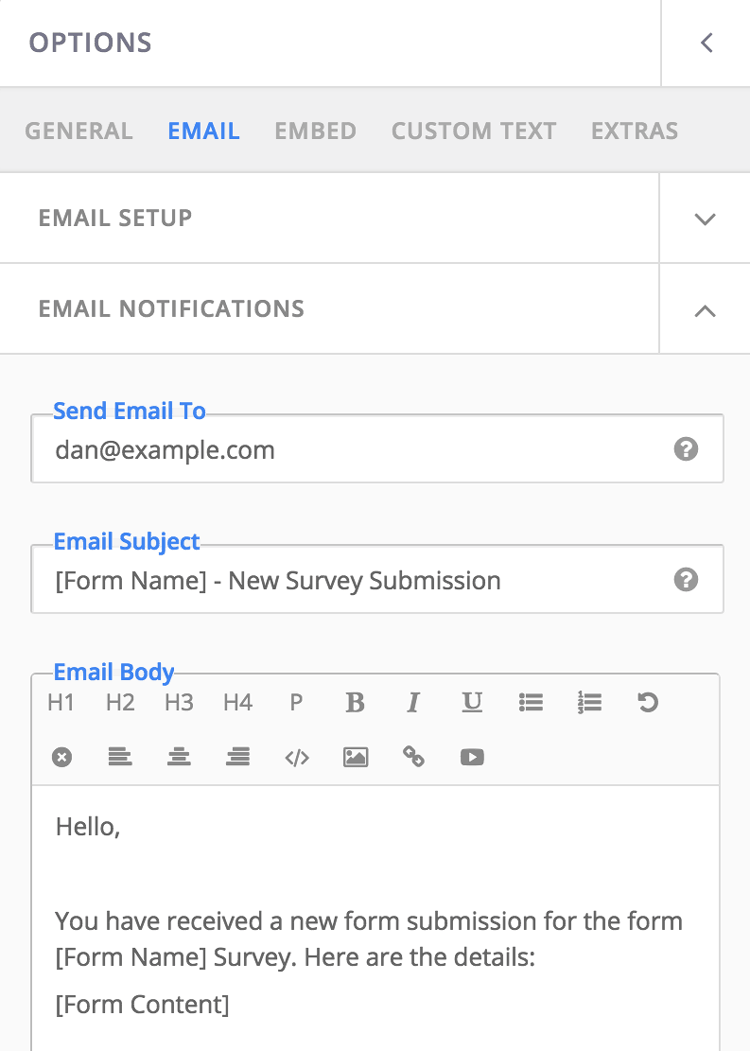
Here, under Send Email To, you can list email addresses of recipients who would get notifications. You can add multiple emails, separated by commas. Email Subject and Email Body allow you to edit the content of this notification email’s subject, and body, respectively.
You can use form values in email subject, and email body. Read more here.
Guide to Using Custom CSS
Custom CSS allows you to alter almost every visual aspect of the form. To apply Custom CSS, we first need to know the CSS selector of the element we wish to alter.
-
Form Selector
Select All Forms
Use the following CSS selector to select every FormCraft form:
.fc-form
Select Popup Forms
Use the following CSS selector to select every FormCraft form inside a popup:
.fc-form-modal .fc-form
Select Sticky Forms
Sticky forms are basically popup forms which are triggered with a button in the bottom-right corner of the page.
Use the following CSS selector to select every sticky FormCraft form:.fc-sticky .fc-form
Select Form By ID
Every form has the class fc-form-32 (where 32 is the form ID). Example:
The CSS class selector of our label is main-label. The following CSS would apply the color red to all labels, of all forms on the page:
.main-label {
color: red;
}
However, if we only want to apply this CSS to a particular form, we would use the form selector as well:
.fc-form-32 .main-label { color: red; } -
Label Selectors
Main Label
Use the CSS selector:
.main-label
Example, to make the color of main labels red, you would use the CSS:
.main-label {
color: red;
}
Sub Label
Use the CSS selector:
.sub-label
-
Field Selectors
Heading Field
To customize the text of the heading field, use the CSS selector:
.form-element-html .heading-cover
Custom Text Field
To customize the text of the heading field, use the CSS selector:
.form-element-html .customText-cover
Input Fields
To customize one-line text field, textarea field, datepicker, email, dropdown and password field, use the CSS selector:
.form-element-html input[type='text'],
.form-element-html input[type='email'],
.form-element-html input[type='password'],
.form-element-html select,
.form-element-html textarea
Checkbox Field
To customize the checkbox field, use the CSS selector:
.form-element-html input[type='radio'],
.form-element-html input[type='checkbox']
Submit Button
To customize the submit button, use the CSS selector:
.form-element-html .submit-button
Fileupload Button
To customize the fileupload button, use the CSS selector:
.form-element-html .fileupload-button
-
Other Selectors
Field Block
To customize the field block, use the CSS selector:
.form-element
You can also select specific fields by their position. To select the first, and second fields from top, use
.form-element-0,
.form-element-1
To select a field with the id field23, use:
.form-element-field23
Example, to increase vertical spacing between fields, use this CSS:
.form-element {
margin-top: 1.5em;
margin-bottom: 1.5em;
}
Success Message
Use this selector:
html .formcraft-css .fc-form .final-success
Example, to change the color of the success message to red, use this Custom CSS:
html .formcraft-css .fc-form .final-success
{
color: red;
}
Customising Email Content
A form submission would typically send two types of emails. A notification email to a list of recipients, and an auto-responder / thank you email to the user who filled the form. The content and subject of both emails is highly customisable.
Using Form Values
You can simply enter the label of the form field, enclosed in square brackets, to include the form value in emails.
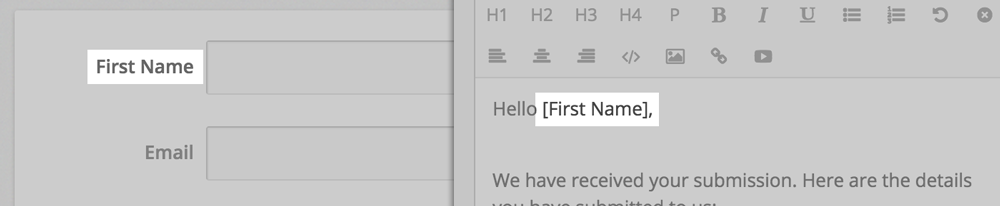
You can also use the tag [Form Content], which would be replaced by the content of all the form fields.
Note: It is also possible to use field IDs instead of field labels, like: [field12]
Labels vs Values
Certain fields, like dropdown and checkbox, allow you specify a value and a label for options. See this image:
Our first option is 2==Extra Cheese. Here, the text to the left of == is the value (2), and to the right is the label (Extra Cheese). The label is what your users see when they fill the form. The value is used for math logic, conditional logic, etc ..
If you want the email to contain the labels, not values, you can use the tag [My Field.label] instead of [My Field]
If you want the email to contain the values, not labels, you can use the tag [My Field.value]
(Where My Field is the label of the above field)
Other Data
Other than form values, you can use some other data tags as well:
| Tag | Content |
|---|---|
| [URL] | URL of the page where the form was submitted from |
| [Form ID] | ID of the form |
| [Form Name] | Name of the form |
| [Entry ID] | Unique ID assigned to the entry. Submissions, even across different forms, do not share the same ID. |
| [Time] | Time of submission |
| [Date] | Date of submission |
| [IP] | User IP address. Available if ‘Collect User IP’ is enabled under Settings -> Advanced. |
How To Setup Email For Getting Notifications
Why This Is Important?
Before you can send email notifications, or auto-responders, you need to configure the email settings, in Options -> Email -> Email Setup. With incorrect or incomplete setup the emails will never reach your inbox.
Email Methods
-
WP Mail
This method uses your server settings for sending emails.
The Good Part: This method requires little configuration. Easy to setup.
The Bad Part: This method is unreliable. This method is the most likely reason your emails are in SPAM, or not reaching your inbox at all. -
SMTP Method
The Good Part: This method is reliable for sending emails, and is recommended.
The Bad Part: This requires some configuration. Don’t worry – scroll down to see how to configure it.
Configure WP Mail
- Sender Name
Type in something like MyBlog - Sender Email
Type in something like dan@myblog.com. Any email address works. If your domain is myblog.com, it’s better to use a Sender Email like dan@myblog.com, rather than myblog@yahoo.com.
Configure SMTP Method
These settings here would depend on your email provider.
Settings for Gmail, or a Google Apps account can be found here. For Yahoo, try this. If you are using Google Apps, you may need to enable the option ‘Enforce Less Secure Apps’. You can read about it here.
If you are using GoDaddy, set the SMTP Host to localhost, and leave the Username, Password and Port as blank.
If you are using an email provided by your web host, you would find the settings with them.
- Sender Name
Type in something like MyBlog - Sender Email
Type in something like dan@myblog.com. - Username
The username that you use to login to this email account. - Password
The password of the account - SMTP Host
For Gmail / Google Apps, this would be smtp.gmail.com. - Port
For Gmail / Google Apps, use port 465 with SSL, or 587 with TLS
I Am Not Getting Emails. Help!
In 90% of the cases, this is because your web host (GoDaddy, and most other shared hosting platforms) are not equipped to send emails.
- If you are using WP Mail method, and it says ‘Email(s) Sent‘ when sending test email, but you don’t get the emails, it’s because your email service is filtering out emails. Please check the SPAM folder.
- If you are using WP Mail method, and it says ‘Email Setup Error‘ when sending test email, your web host isn’t configured to send emails. Please create a ticket with them.
- If you are using SMTP Method, and it says ‘SMTP Error‘ or ‘SMTP connect() failed‘ when sending test email, your web host has probably blocked outgoing SMTP. Please check with them.
- Check the ‘From’ address, and see it matches your domain. If your domain is myblog.com, use a ‘From’ address like dan@myblog.com, rather than using myblog@yahoo.com.
Using an Email plugin
One way resolve the issue is using a third-party email plugin. When you setup an email plugin Formcraft will route all emails through this plugin when the WP mail method is selected on the form. Third-party email plugins (like Fluent SMTP) give you more control over the email connection, SMTP settings, etc .. and offer better debugging tools.
How To Use Conditional Logic
FormCraft has powerful built-in Conditional Logic. You can use it to:
- Show / Hide fields
- Send Emails to Recipients
- Redirect to Custom URL on Submit
- Trigger Intergrations
- Set Value of Other Fields
-
Show / Hide Fields:
Lets go for a simple tutorial. Add a Datepicker, a Checkbox, and a Custom Text field to your form. Make your form look like this:
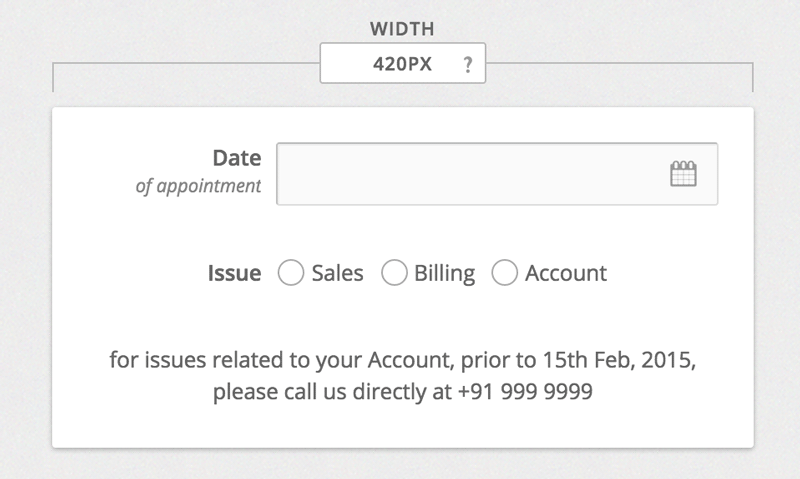
Now, go to Logic, and click on Add New Logic. Our job is to show the text field, if the user selects a date before 15th Feb, 2015, AND has selected the option Account.
So, our logic would look like this:
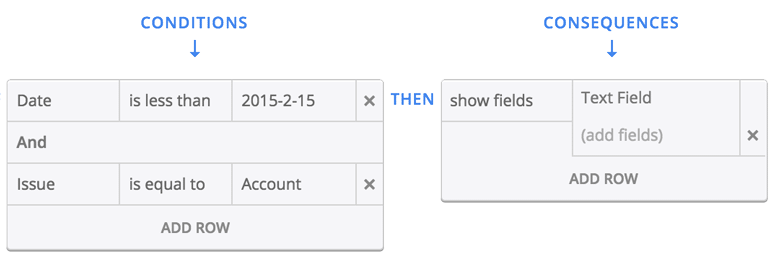
When using the Datepicker field in Conditional Logic, it is important that you use the format YYYY-MM-DD, as seen above. Also, note that we can choose between AND / OR. Since we want to show the Text Field when both conditions are fulfilled, we will stick with AND.
Now, edit the text field in our form, and check the option Hide Field on Page Load. Since we are showing the field when certain conditions are fulfilled, we would also want to make sure the field is hidden on page load.
Under Conditions, it is not necessary to compare an absolute value. You can compare the value of two fields. Example, you can use the condition: Email is equal to [field12] to trigger an action only when the value of the email field is equal to the value of the field with the ID field12
-
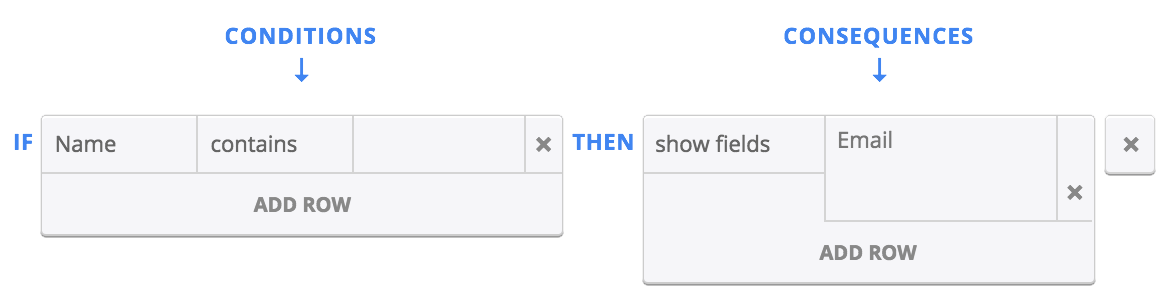
Special Case 1: Show Field When Not Empty
You might want to show a field when the first field contains any value (i.e., it is not empty). In this case, use this logic:
-
-
Send Emails to Recipients
Add a Checkbox field to your form, and add the options:
Sales
Billing
Account
Now, when the user selects Sales, we want to notify sales@example.com. When he selects Billing, we will notify jack@example.com.
So, we need to add two simple logics:
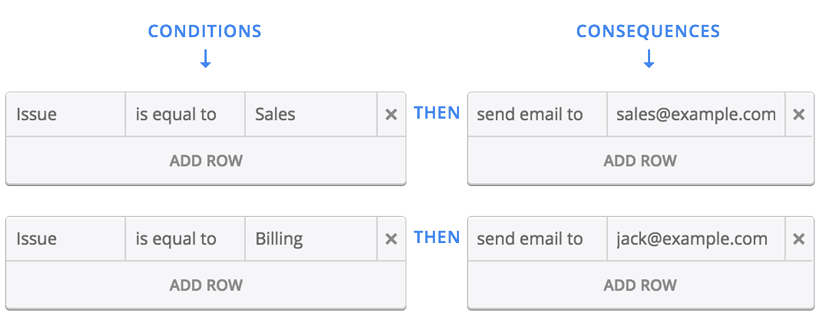
You can add multiple emails by separating them with a comma.
-
Redirect to Custom URL on Submit
Add a Checkbox field to your form, and add the options:
Sales
Billing
Account
Now, when the user selects Sales, we want to redirect him to the page: http://example.com/thank-you.
This is fairly simple:
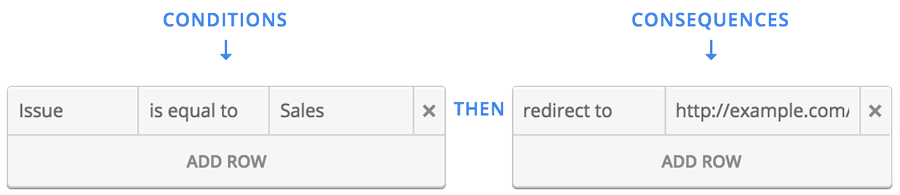
You can also use form values in the URL itself, like:
http://example.com?issue_selected=[Issue]
-
Trigger Integrations
So, you want a contact us form which has a checkbox field, Sign Up For Updates. If the users checks this field, you want to add his email to your MailChimp list. First, add a checkbox field, with only one option:
Signup for Newsletter
When editing this field, also check the option Allow Multiple Selections, since this would allow the user to check / uncheck the one option:

Next, we use this simple conditional logic:

-
Set Value of Other Fields
Add an email field to your form, and a checkbox field. Label the checkbox field Gmail Account?. Our form looks like this:
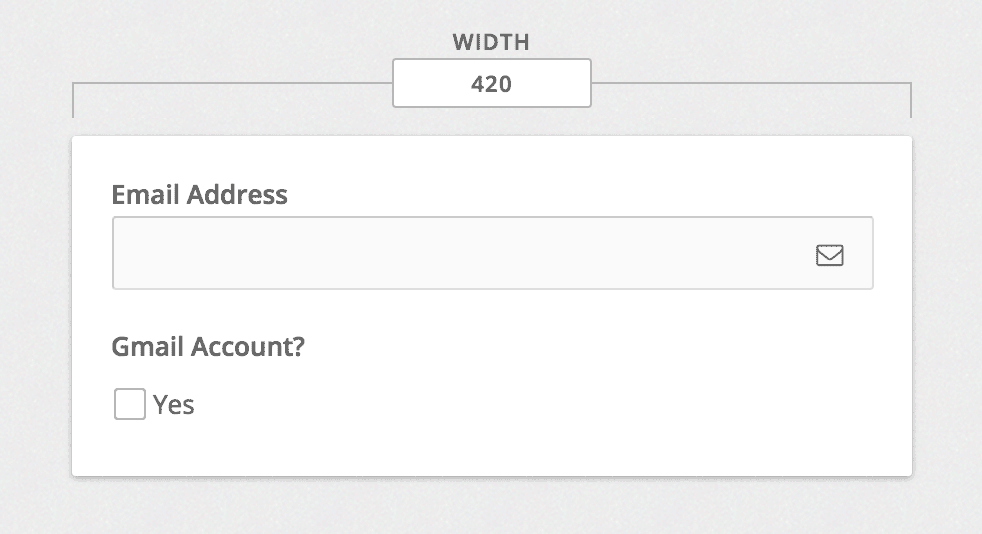
Now add a new logic:
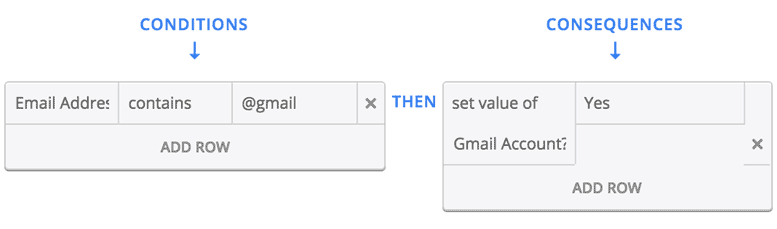
So, if the text entered by the user in the email field contains @gmail, we automatically set the value of the other field to Yes (in this case, check the option Yes)
Note: Working With Checkbox / Dropdown Fields
Checkbox and dropdown fields allow you to set a value which is separate from label. The front-end user only sees the label. You type the value and label in the same line, separated by a ==
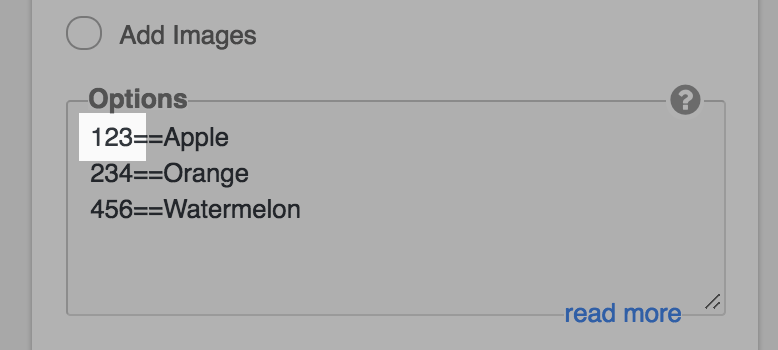
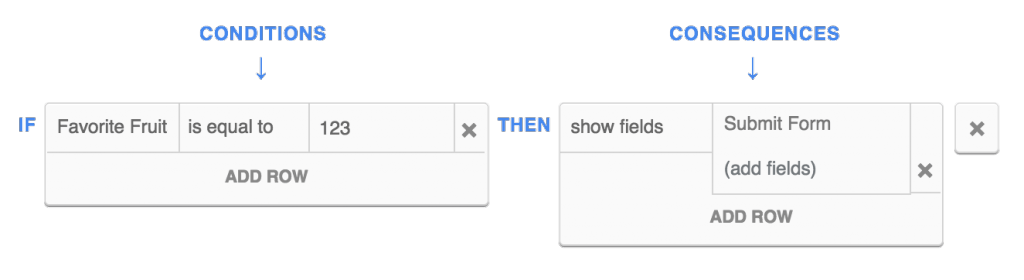
If you want to use conditional logic with this field, you would use the value when defining conditions. If we want to show a certain field when the user selects Apple, we would use the logic:
If MyField is equal to 123 show MyField2
since the value of the option corresponding with the Apple label is 123.
How To Use Math Formulas
Simple Example
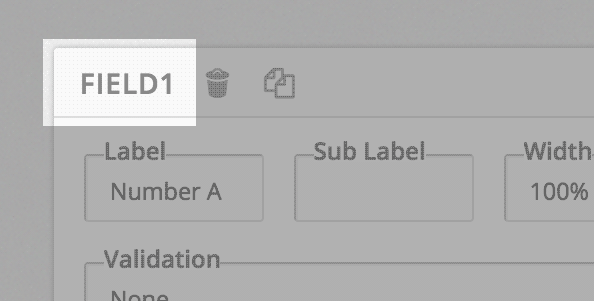
Add two One Line Input fields in your form. Note the Field IDs of both fields:
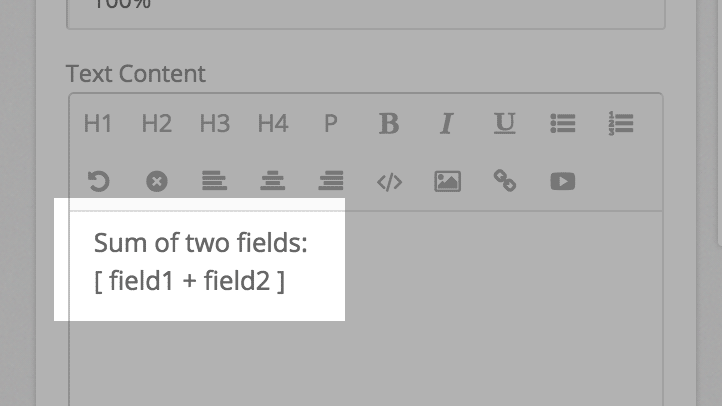
Now add a Custom Text field to the form. In the Text Content area, type the formula: [ field1 + field2 ]
You can click on Preview. Our form would look like this:
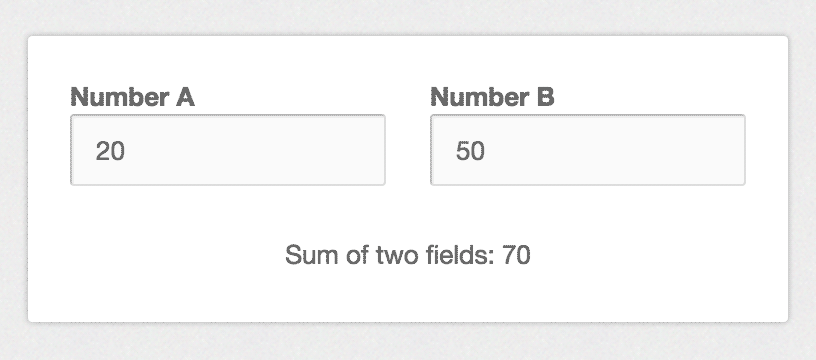
You can type two numbers in the fields, and our text field will automatically calculate the value, and show it.
Summary
You can use math formulas in the Text Content or Field Value columns of a Custom Text field.
A formula is enclosed in square brackets. Basic operators are allowed in math formulas: + – / * ( )
Special Considerations
Datepicker
You can use the math formula here to calculate the difference between two dates. If you have two date fields in your form, with fields IDs being field2 and field5, you can use this formula: [ field5 – field2 ]
Fileupload
If the field id of a fileupload field is used in a formula, it will return the number of files uploaded.
Range Slider
A range slider field would return the average of the selected range. Example, if the user has selected 100 – 400 as the range, this field would return 250 as the value, when used in a math formula.
Timepicker
A timepicker field would return the hour selected by the user. So, if the user has selected 7 : 35 AM as the time, this field would return 7, when used in a formula.